
A new office pod lands on site. The install goes well. The furniture is in. The acoustics feel right. Then the surrounding plasterboard walls let the whole scheme down.
That happens more often than facilities teams expect. A premium booth can look finished on day one, but if the adjacent walls flash, patch, scuff easily, or show roller marks under office lighting, the whole space feels compromised. In a workplace where pods are part of the employee experience, paint isn’t a finishing afterthought. It’s part of the fit-out standard.
Knowing how to paint onto plasterboard properly matters even more around high-value acoustic areas. Whether the space includes a focus booth, a meeting room pod, or upgraded walling such as sound proof board for walls, the paint system around it needs to look deliberate, durable, and consistent with the rest of the office.
Table of Contents
- From New Pod to Integrated Space
- The Foundation Flawless Surface Preparation
- Priming and Sealing for Commercial Durability
- Selecting and Applying the Perfect Topcoat
- Pods Sustainability and Long-Term Value
- Create Your Perfect Workspace Today
From New Pod to Integrated Space
Monday morning. The pod has arrived, the glazing is clean, the joinery is sharp, and the handover photos are booked. Then the wall beside it catches the light and every patch, joint line, and roller stop shows up. In a commercial interior, that is enough to make a premium installation feel unfinished.
That is why the surrounding plasterboard matters as much as the pod itself. Whether you are specifying BlockO office pods, Framery office pods, Kabin office pods, or Vetrospace office pods, the eye reads the pod and its backdrop as one composition. If the wall finish is weak, the pod does not carry the space on its own.
In office fit-outs, painted plasterboard has to do more than look tidy. It has to sit cleanly against glazing, trims, service penetrations, and pod elevations. It also needs to stand up to daily traffic, cleaning, chair contact, and the hard side-lighting common in meeting zones and touchdown spaces. A finish that passes on a domestic wall often falls short here.
Acoustic performance also affects the decorating brief. Many pod schemes sit within partitions built with sound proof boards for commercial wall systems, so the paint build-up needs to support the specification rather than undermine it with poor prep, cracked joints, or cheap coatings that mark too easily. Good painting protects appearance, but it also helps maintain the integrity of the finished partition in a space that gets used hard.
Facilities managers usually face a straightforward trade-off. Push for speed at handover and small defects stay hidden until occupancy, lighting, and daily use expose them. Allow proper sequencing, inspection, and curing time, and the finish holds its colour, uniformity, and credibility for longer. That reduces snagging, repeat visits, and the quiet irritation that comes when a new workspace already looks tired.
If you want a second reference point on site standards before paint goes anywhere near the board, Hallmoore's guide to wall prep is a useful checklist. The same principle applies here. Premium pods deserve walls finished to the same standard as the product sitting in front of them.
The Foundation Flawless Surface Preparation
A wall can look acceptable at snagging stage and still fail the moment the lights go on. In office interiors, linear LEDs, glazing, and the clean geometry around acoustic pods expose every hollow, lap mark, and raised joint. If the plasterboard prep is average, the whole pod installation looks cheaper than it is.
The technical problem is simple. Joint compound and plasterboard paper absorb coatings differently. Resene explains that porosity difference clearly in its plasterboard painting guidance. On site, that is what causes flashing, patchiness, and those dull bands that appear along stopped joints after painting.
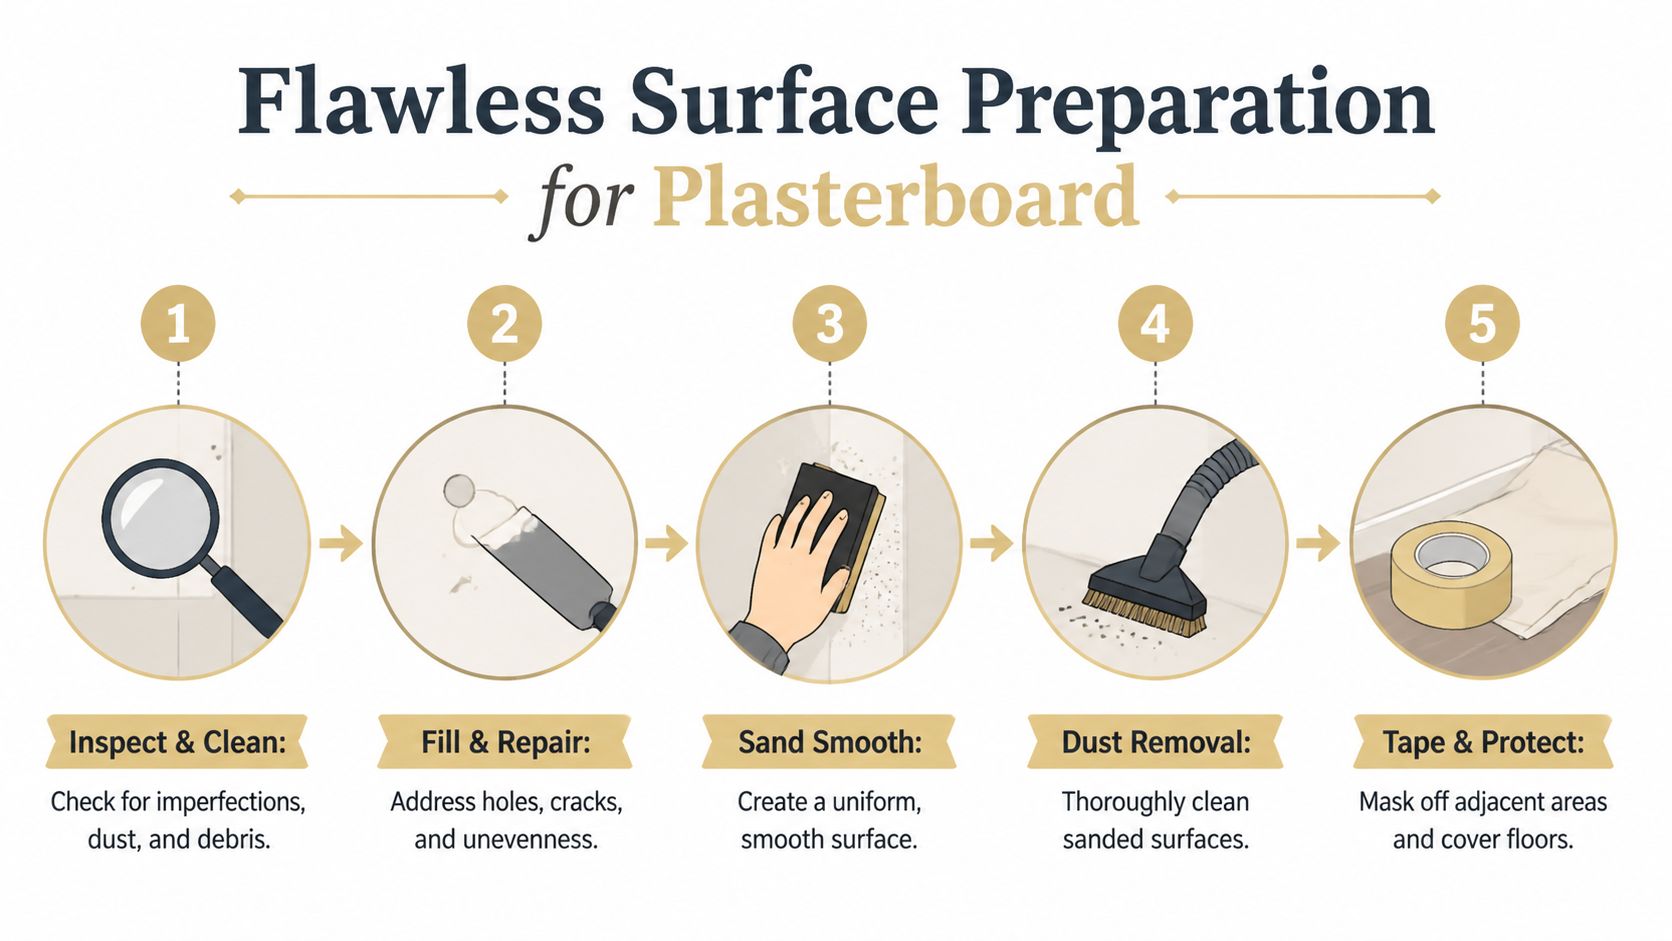
A prep sequence that works on commercial sites
Good prep is inspection first, sanding second, cleaning third, protection throughout. Change that order and defects creep in.
Inspect every joint and fixing line
Start with side lighting if possible. It shows ridges and shallow dips far better than front-on room light. Check long seams, screw lines, external angles, cut edges, and any paper scuffs caused by follow-on trades. Pay close attention where the wall runs into pod frames, door sets, glazing channels, and service penetrations. Those junctions are where commercial jobs lose their crispness.Sand the final plaster coat with control
The same guide recommends 180 to 360 grit sandpaper before the first coat. That range is fine enough to flatten minor high spots without tearing the face paper. On a busy fit-out, over-sanding is as much of a problem as under-sanding. Once the paper face is damaged, you create another repair area with different suction and a greater risk of visible patching.Remove dust properly
Fine dust kills finish quality. It sits in the coating, weakens adhesion, and leaves a rough texture that stands out under office lighting. Brush the wall down, vacuum corners and horizontal ledges, then wipe nearby trims, skirtings, and pod edges so loose dust does not get dragged back across wet paint.Protect adjacent finishes before any coating starts
Masking is not just housekeeping. It protects expensive joinery, glazed pod fronts, flooring, ironmongery, and specialist boards installed as part of the acoustic build-up. That matters where partitions include products such as 15 mm Soundbloc plasterboard for commercial acoustic walls, because the visual standard around those systems is usually higher and the replacement cost certainly is.
Facilities teams often get pushed to compress decorating time near handover. That usually shows up later as flashing at joint lines, rough texture near cut-ins, and impact marks around pods that were never properly protected during prep. Extra time spent checking stoppage, dust removal, and masking saves return visits and keeps the installation looking specified for longer.
For a broader site-ready checklist, Hallmoore's guide to wall prep is a useful reference because it reinforces the practical discipline needed before paint ever comes out of the tin.
One final trade detail matters. After the sealer coat, a light de-nib with the same abrasive range improves the final texture noticeably. In premium office work, that small step is often the difference between a wall that merely looks painted and one that looks integrated with the pod, the partition, and the rest of the interior fit-out.
Priming and Sealing for Commercial Durability
A plasterboard wall beside an office pod gets judged harder than a standard partition. Light catches every joint line, users brush past it all day, and any patchiness makes the pod look added late rather than designed into the scheme. Primer and sealer are what stop that from happening.
Why the sealer coat carries the finish
On new plasterboard, the paper face and the filled joints absorb paint differently. If that suction is left unchecked, the topcoat dries at different rates across the same wall. Under office lighting, that shows up as flashing, dull bands, and visible jointing that clients often blame on the final coat.
An acrylic sealer undercoat solves that problem by regulating absorption first. It also binds any remaining fine surface dust that escaped cleaning, which matters on busy commercial sites where several trades may still be working nearby.
The sequence is straightforward. Apply the sealer evenly, let it dry fully, then de-nib lightly before topcoats. That small sanding pass cuts off raised fibres and roller stipple before they get locked into the decorative system.
Where wall upgrades sit near external walls, service risers, or insulated linings, specification can affect decoration too. Products such as foil backed plasterboard for insulated commercial wall build-ups still need the same disciplined approach. The board may differ, but the finish only looks uniform if the surface is sealed consistently.
Where commercial jobs usually fail
Failures on commercial interiors are usually process failures, not paint failures. The pattern is familiar on pod installations and fast-track refurbishments.
Primer gets skipped
A mist-coat approach taken from domestic work leaves inconsistent suction across the wall. Under stronger task lighting and glazing reflections, patchiness becomes obvious.Finish paint is asked to do the sealer's job
Extra coats get used to hide unevenness that should have been dealt with before decoration. Cost goes up, drying becomes less predictable, and the surface still lacks uniformity.Edges and service cuts are ignored
Around pod interfaces, sockets, trims, and shadow gaps, unsealed cuts can absorb paint faster than the main face. Those details are often where the wall starts to look tired first.No de-nib between coats
Dust nibs, lifted paper fibres, and small debris stay trapped in the film. On a plain corridor wall that may pass. On a premium workspace fit-out, it does not.
A short visual walkthrough can help when teams want to brief contractors or compare methods across sites.
Get the sealer stage right and the rest of the system works harder for you. Topcoats sit flatter, touch up more cleanly, and hold a more even appearance around pod doors, circulation routes, and high-contact wall sections.
Selecting and Applying the Perfect Topcoat
Once the board is prepared and sealed properly, the topcoat becomes a strategic choice. With this choice, appearance, maintenance, and the feel of the workspace come together.
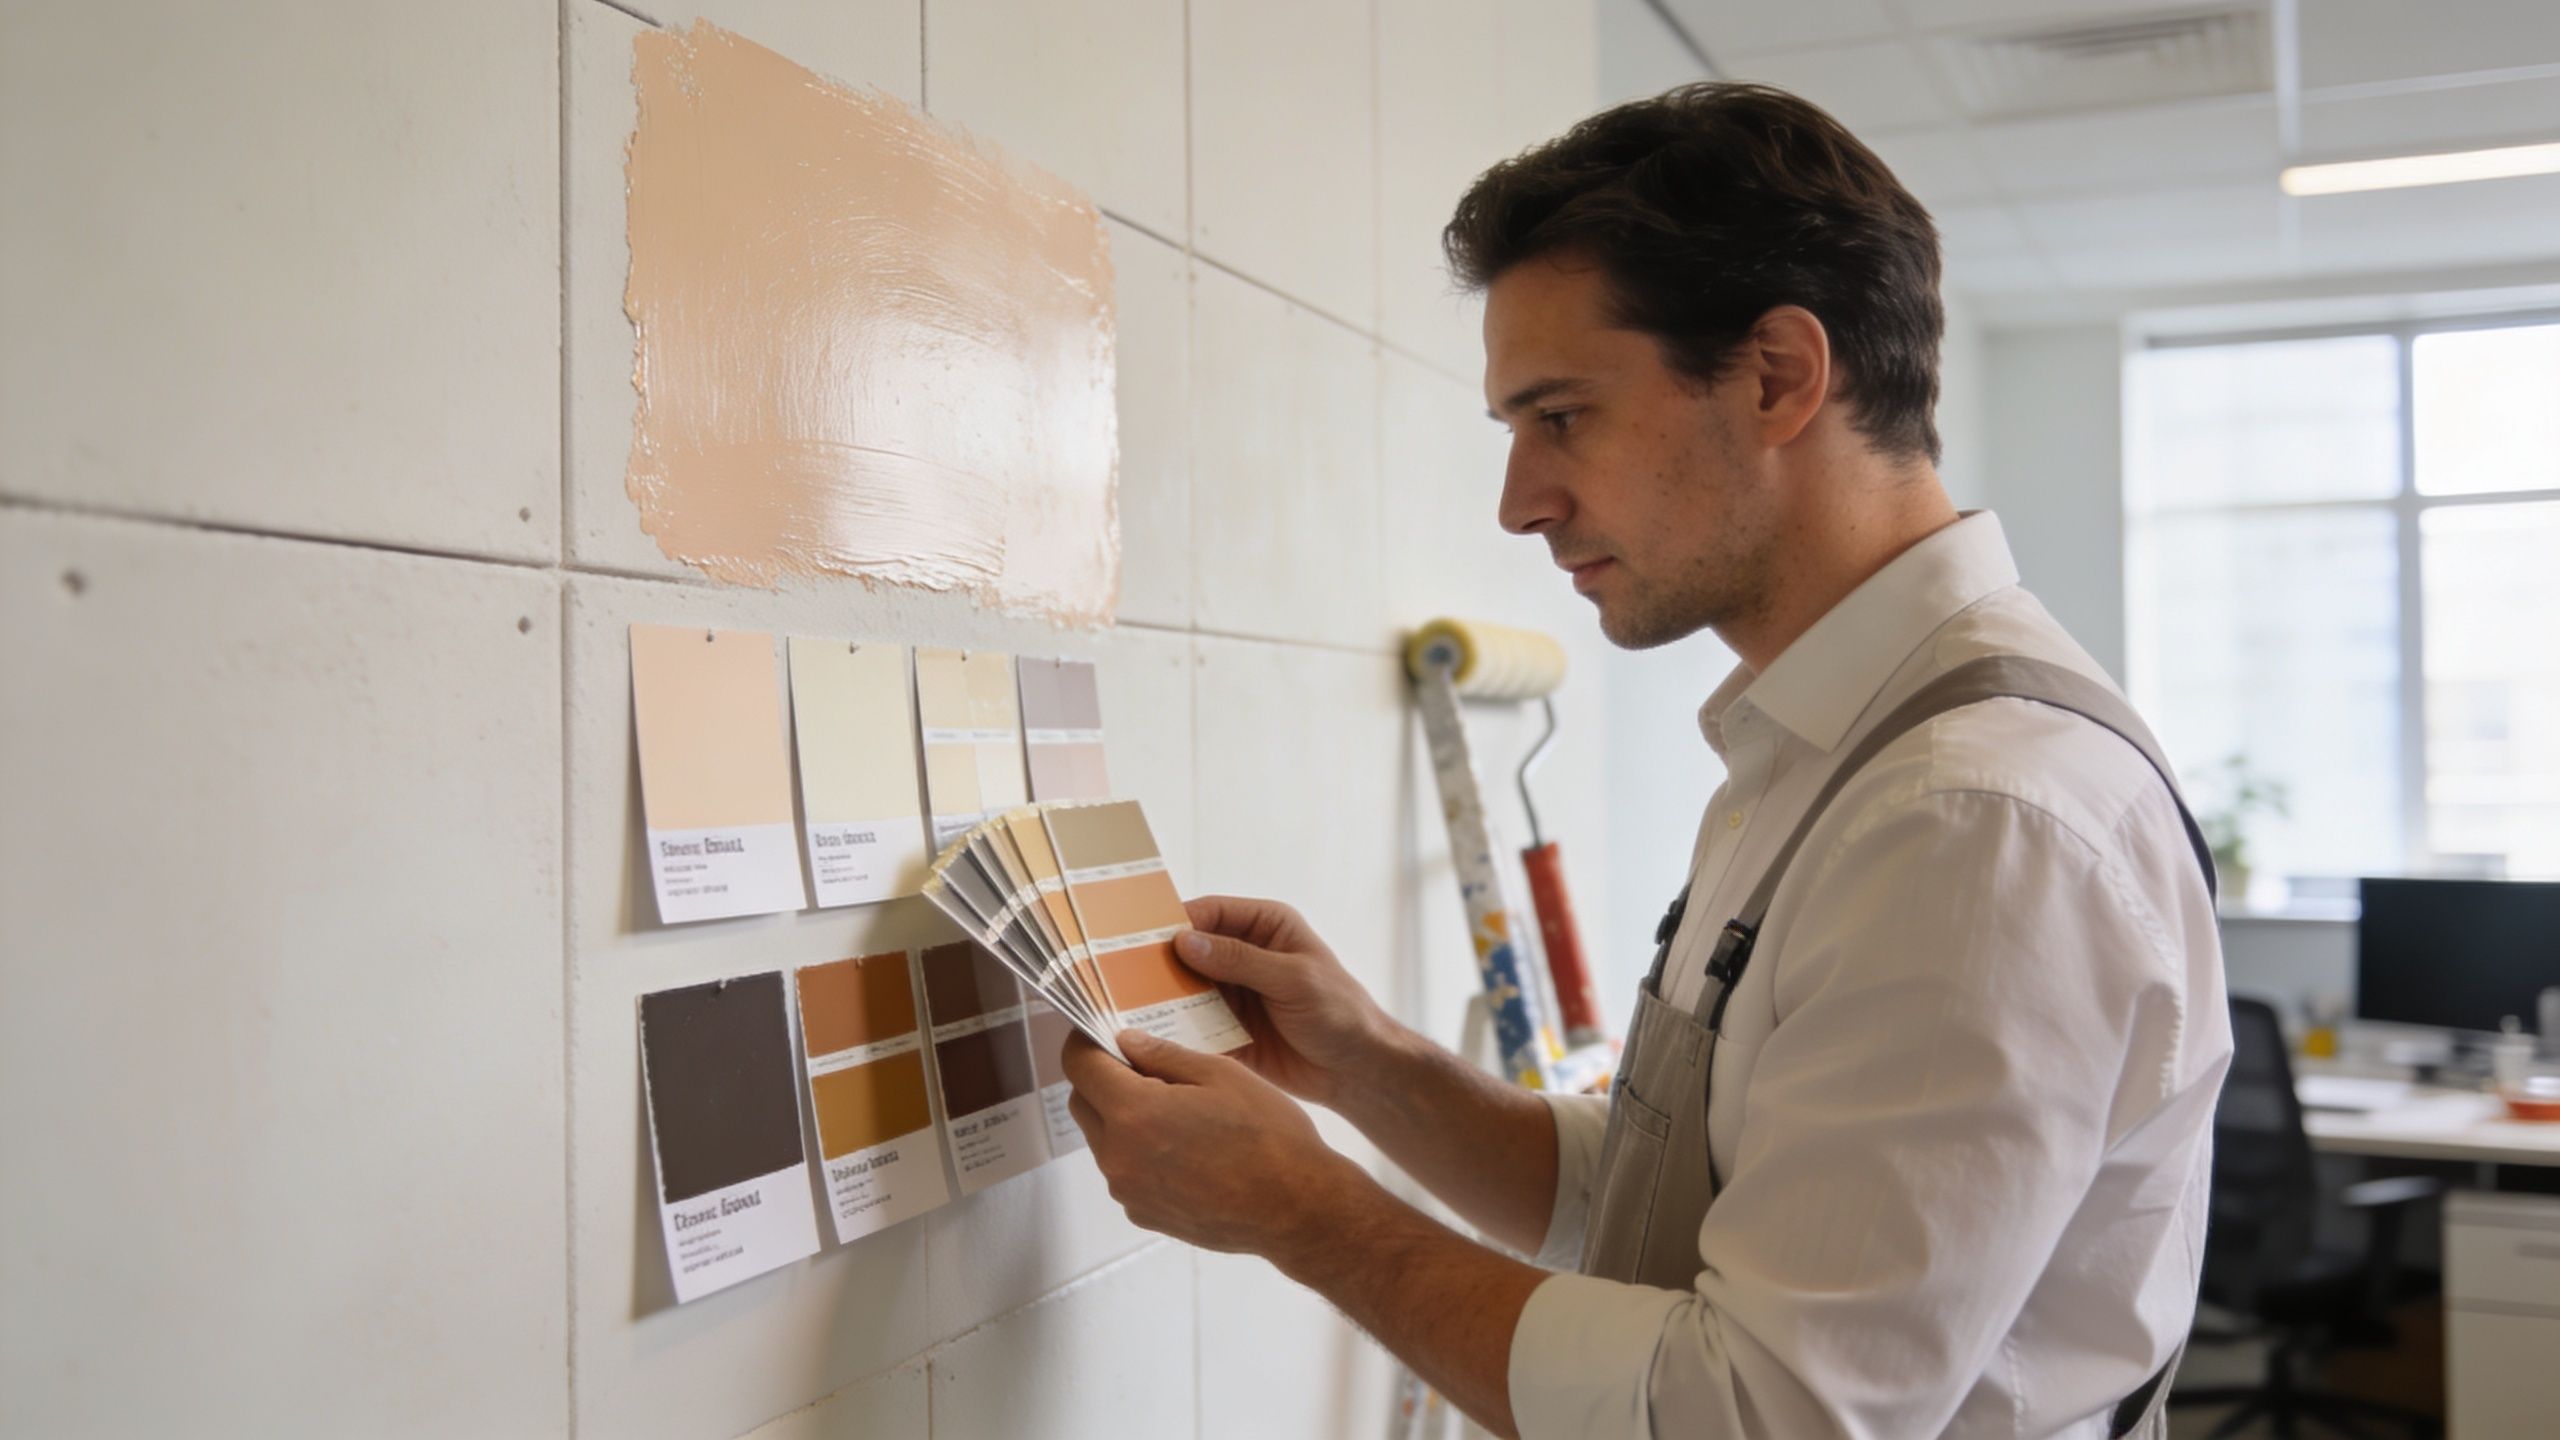
Choosing finish by use not by brochure
A reception backdrop, a corridor beside call booths, and a meeting zone around glazed rooms don't all need the same finish. The right question isn't which paint looks nicest on a fan deck. It's which finish suits the wear pattern and the lighting conditions of that wall.
A simple selection guide helps:
| Area | Usually works best | Main reason |
|---|---|---|
| Focus zones and pod surrounds | Durable matt or low sheen | Soft visual finish with less highlight on minor surface variation |
| Busy circulation routes | Washable eggshell or satin-type commercial finish | Better resistance to rubbing and regular contact |
| Feature walls | Controlled sheen chosen to match lighting | Stronger colour depth, but only if surface prep is excellent |
When partitions form part of the wider space, coordination matters too. Clean lines between painted plasterboard and glazed systems from Logika partitions work best when the wall finish is even and understated rather than over-textured.
There is also an acoustic consideration that many standard decorating guides ignore. According to Inspirations Paint’s plasterboard surface guidance, standard guides focus on finish but don't discuss how different paint types or application methods affect acoustic properties. The same guidance notes that textured versus flat finishes can impact sound absorption, which is relevant when treating walls around acoustic office pods.
“Paint won’t replace an acoustic treatment, but the wrong wall finish can work against the calm atmosphere a pod is trying to create.”
That doesn't mean every office needs a specialist acoustic coating. It means the finish should be chosen with awareness. Heavy texture can change how the space feels visually and acoustically. Flat, controlled finishes usually sit more comfortably around refined pod installations.
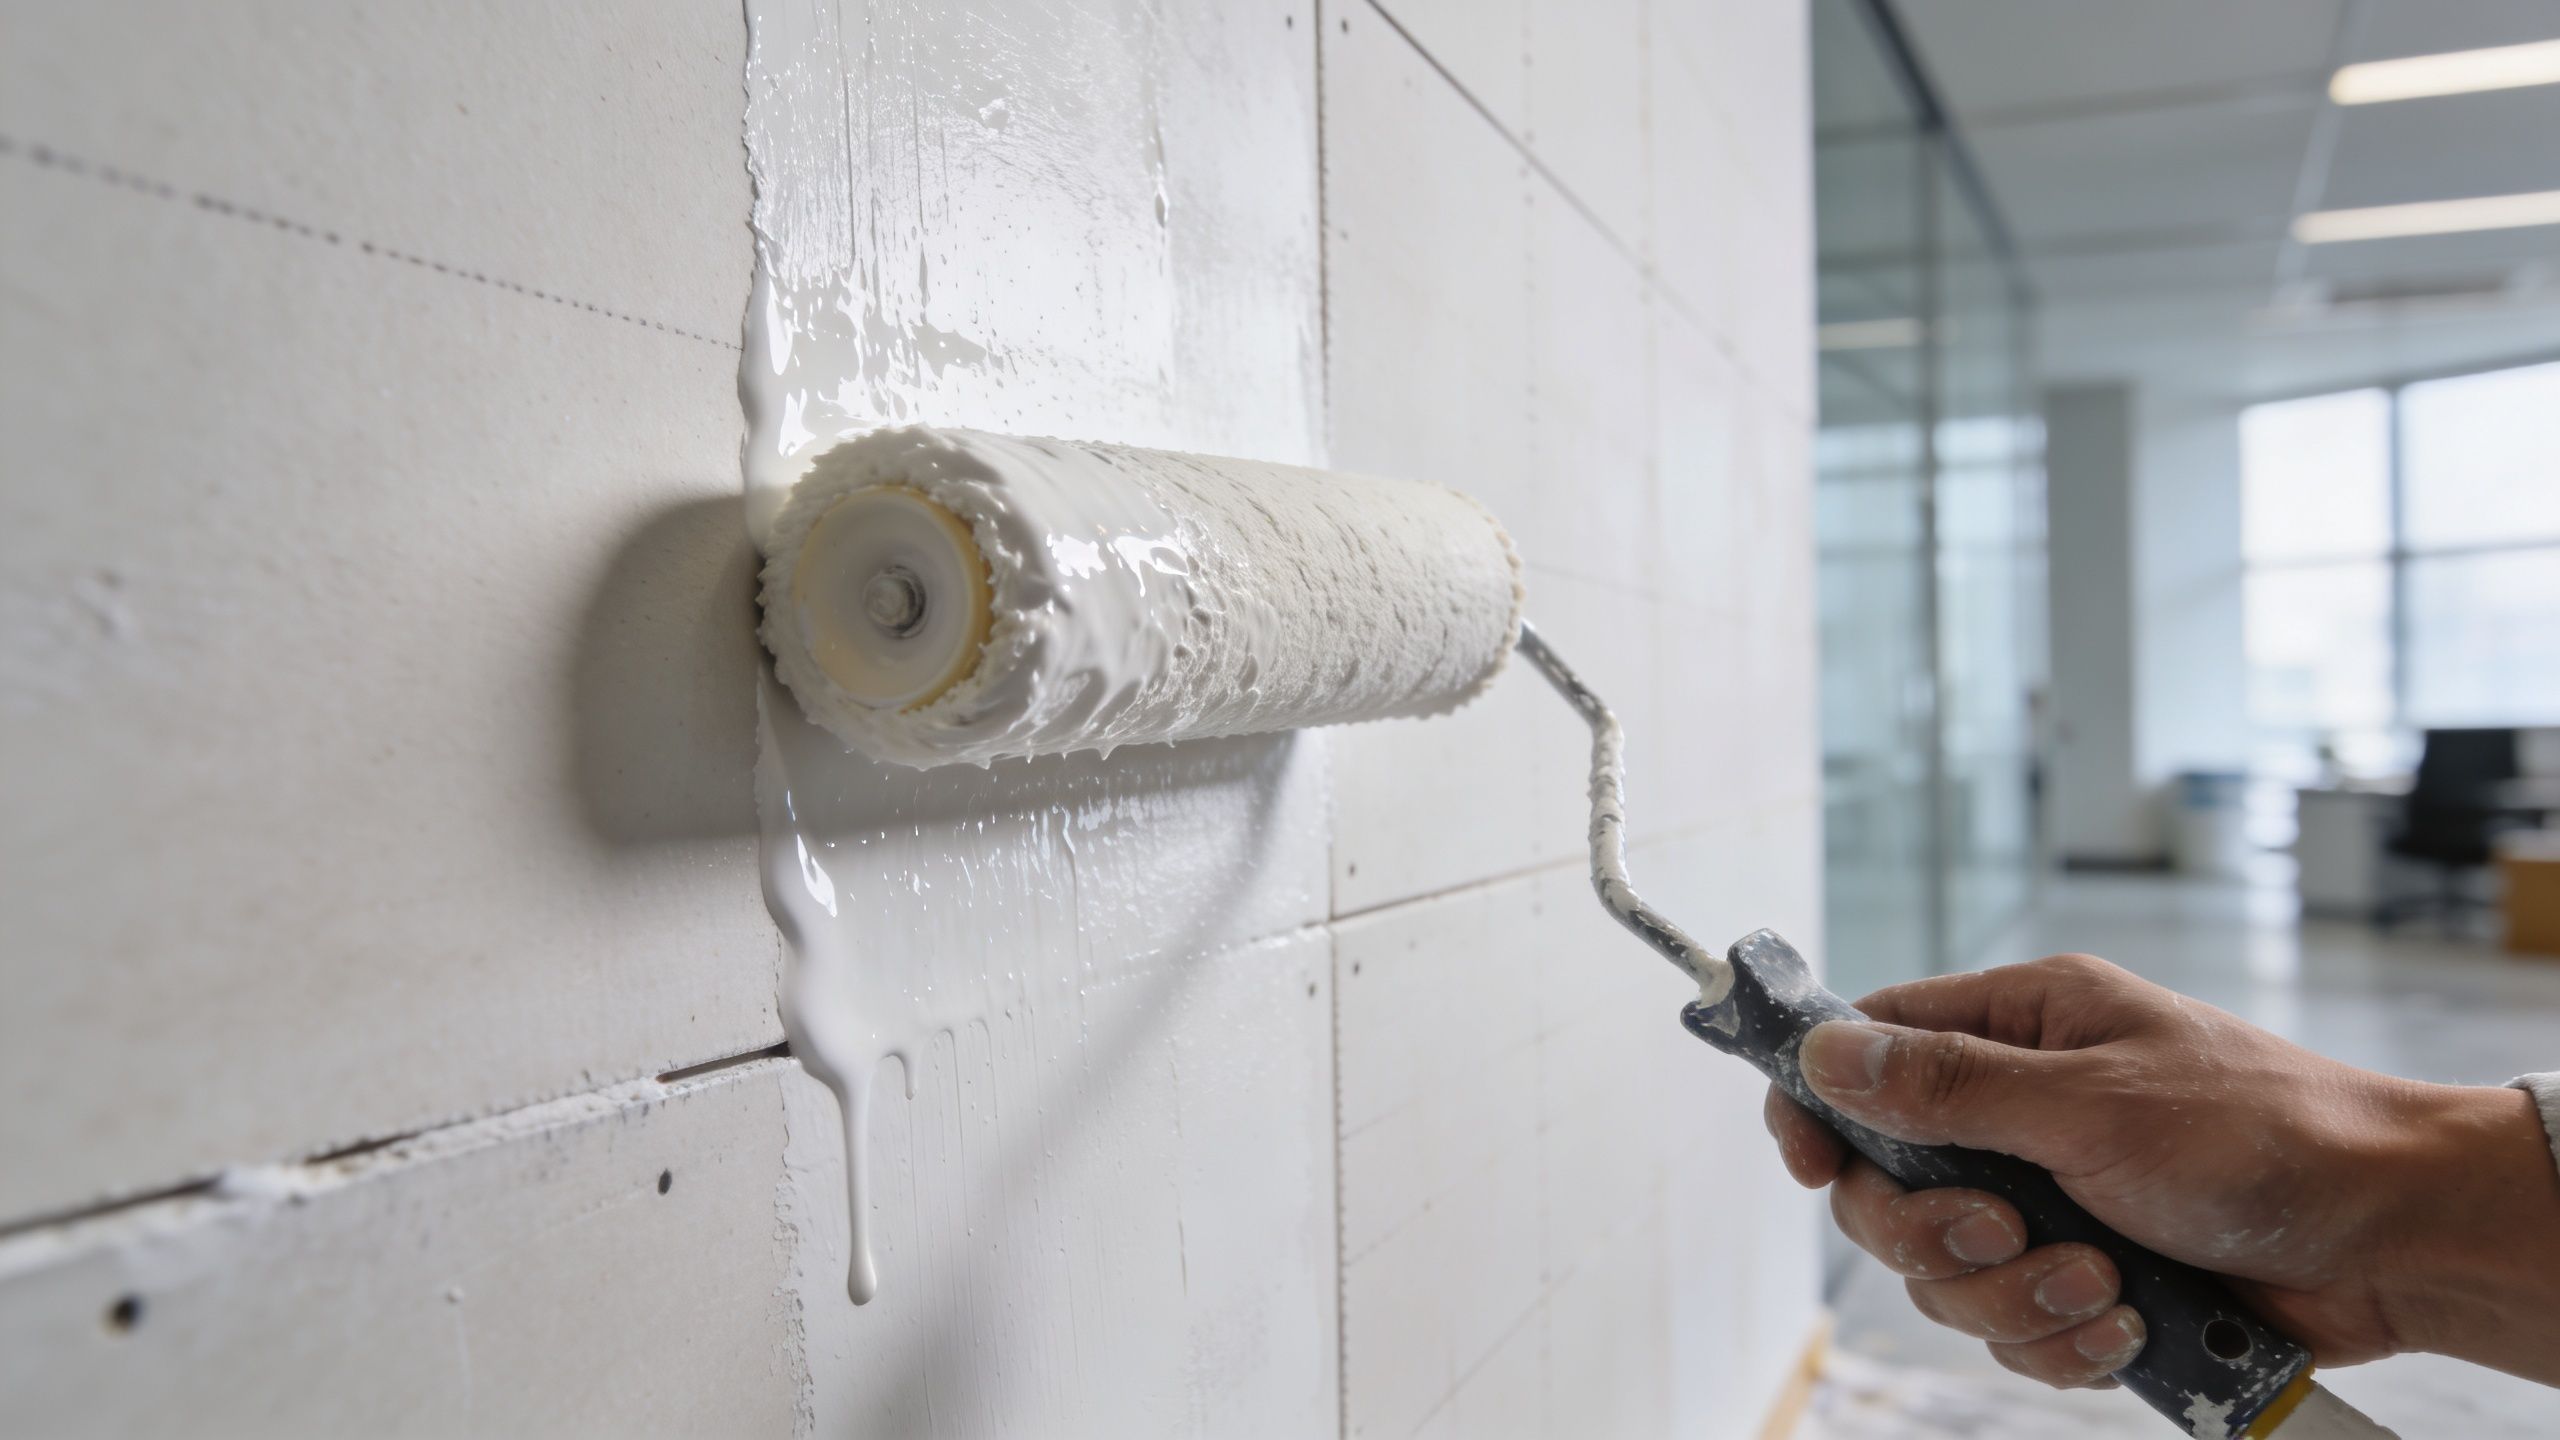
Roller technique that prevents lap marks
Application method affects the final look as much as the paint itself. The roller choice should match the coating system. Industry guidance recommends 12mm wool or wool-blend rollers for flat matte or low-sheen plasterboard sealers, and 6-8mm short soft synthetic fibre rollers for gloss acrylic applications according to this roller application demonstration.
Technique matters just as much:
- Pre-condition the roller by immersing it in water or the appropriate solvent before use.
- Don't overload the sleeve because too much paint leaves heavy texture and weakens consistency.
- Roll into wet edges rather than away from them.
- Use lighter pressure near the wet edge so the paint charge tapers cleanly.
On long office walls, this is what prevents banding and visible joins. It also helps the wall finish sit comfortably beside the cleaner factory-made surfaces of pods, trims, and glazed screens.
Pods Sustainability and Long-Term Value
A paint spec earns its keep long after handover. In offices built around pods, booths, and quiet rooms, the wall finish has to do three jobs at once. It has to keep the space looking sharp, stand up to cleaning and everyday knocks, and support a fit-out strategy that can adapt over time.
Customisation that protects the wider investment
Pods often become the visual reference point for the whole floor. If the surrounding plasterboard is poorly finished or repainted with the wrong product six months later, the pod still looks premium but the room around it does not. That mismatch is common in commercial refurbishments, and it makes expensive assets feel stranded instead of integrated.
Paint gives facilities teams a low-disruption way to tune the setting around pods without changing the pod itself. Colour zoning can define focus areas, circulation routes, touchdown spaces, and collaboration zones. Done well, it helps acoustic pods sit naturally within the broader scheme, especially where factory-finished surfaces, glazing, and joinery all need the walls to look controlled rather than decorative.
The maintenance side matters just as much. Facilities managers are not buying paint for handover day. They are buying repaint intervals, washability, touch-up performance, and fewer complaints when walls start to show traffic marks around pod entrances, bag-drop points, and shared circulation space.
Paint strategy and the circular economy
Sustainability in this context is usually practical rather than theatrical. A finish that lasts longer reduces rework, site visits, material use, and disruption to occupied teams. Low-VOC, water-based systems often fit that brief well, provided they are matched to the level of wear and the cleaning regime expected in the space.
That same thinking sits behind flexible workplace planning. Subscription and reuse models for pods make sense because office requirements change. Finishes should be specified with the same discipline. If a team may reconfigure space, add pods, or change branding later, a paint system with predictable touch-up behaviour and straightforward maintenance has more long-term value than a fashionable finish that is awkward to repair.
Gibbsonn’s broader sustainability position reflects that approach. Gibbsonn’s sustainability approach focuses on longevity, reuse, and lower-waste decisions at specification stage, which is where good commercial value is usually won or lost. Facilities teams looking at the wider workplace picture can also read this piece on modern office solutions, especially where flexibility, user experience, and long-term asset planning all sit in the same brief.
Create Your Perfect Workspace Today
Painting plasterboard well isn't complicated, but it is disciplined. The walls need proper preparation, the surface needs sealing for control, and the topcoat needs to match the way the space is used.
That matters even more in offices built around privacy, focus, and acoustic comfort. Pods set a high visual standard. The surrounding walls need to meet it. A poor finish makes the whole project feel cheaper than it is. A well-executed finish helps the pod, the partitioning, the lighting, and the rest of the fit-out read as one coherent workplace.
Facilities teams looking at broader workplace upgrades may also find useful context in this article on modern office solutions, especially where technology, flexibility, and user experience all shape the brief. Paint sits inside that same conversation. It affects how a space is perceived, maintained, and used every day.
The right result comes from treating plasterboard painting as part of the commercial interior, not as an isolated decorating task. That is how the office keeps its premium feel around every booth, meeting zone, and quiet space.
If you're planning a workspace refresh, adding new pods, or want advice on how finishes can help your office feel more cohesive, Gibbsonn can help. Teams can also book an appointment and visit the showroom in Bishop's Stortford to see pod options in person and discuss the right solution for the space.